Office 365 Mail account - Configuration iOS
1: Setup email on iOS devices (iPhone & iPad) :
Go to the settings :
In our example, we configure an account on an iPhone 6 Plus iOS 12.4.8
Make sure that you are connected to the internet via 3G or Wi-Fi

2 : Password and Account :
Under "Settings", go to “Password & Accounts".
Here, you can add account.

3: Add an email account :
You will see an interface where the different email accounts already set up on your device are listed.
Tap on "Add Account" to continue.

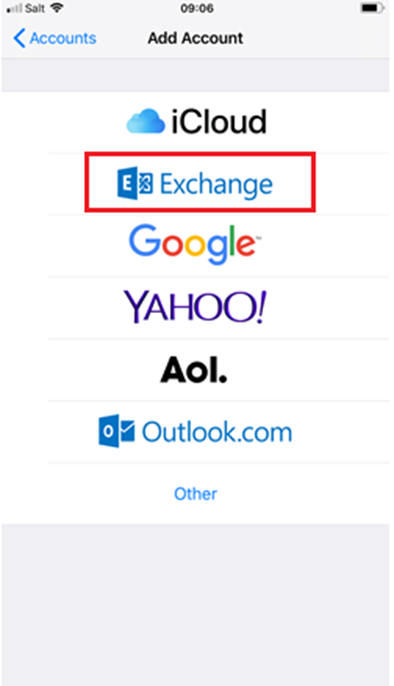
4 : Email account type
Select "Microsoft Exchange" as the account type.

5: Email account settings :
Enter the following details about your account:
Email: your full email address : e.g : “yourname@domain.ch”
Password: the account password we gave you
"Description": the display name of the account in the mailbox client,e.g Yourname Exchange.
You can test the settings of your KissMail account in the WEB interface OWA : https://mail.kisslabs.ch
Click “Next".

6: Advanced account settings :
Now enter your KissLabs account details.
"Email": your full email address.
"Exchange Server": mail.kisslabs.ch
"Domain": this is optional, but we advise you to enter it : kisslabs.
"Username": yourname or in some case yourname@yourdomain.ch.
"Password": account password we gave you
"Description": The display name of the account in your email client.
Click "Next" to continue.

7: Synchronise Exchange services :
You can choose to synchronise different services with your account.
After making your selection, click "Save" to continue.

8: Finish up :
Your account should now be configured correctly. You can verify in Passwords and Account that your account appear.
Now you can use native iOS email application “Mail” or third party software (nine, outlook and others) to access your email account (Mails, Calendar,Contacts …)

